Maintaining your portable ice maker is critical for ensuring that it operates smoothly and produces fresh ice consistently. A clean ice maker not only enhances the taste of your beverages but also prolongs the lifespan of the machine. When ice makers are neglected, they can harbor bacteria, produce unpleasant odors, and even malfunction over time. Understanding the best practices for cleaning these devices will empower you to keep your ice maker in optimal condition. In this article, we delve into essential cleaning techniques, share helpful tips, and provide resources to make the process seamless and efficient.
Why Cleaning Your Portable Ice Maker is Essential
Regular cleaning of your portable ice maker is vital for several reasons. Primarily, it helps maintain sanitation, ensuring that the ice produced is free from contaminants. Additionally, cleaning your ice maker improves efficiency, reducing the strain on the machine and potentially lowering energy costs. If neglected, the build-up of minerals and mold can lead to unpleasant odors that taint the ice. The consequence of an unclean ice maker could be costly, both in terms of health and the longevity of the device. Therefore, prioritizing regular maintenance is a practice you should adopt without hesitation.
Materials Needed for Cleaning

Before embarking on the cleaning process, gathering the right materials will streamline your efforts. Here’s a checklist of necessary supplies:
- White vinegar or a commercial descaler
- Water
- Mild dish soap
- Soft cloths or sponges
- A toothbrush or small brush for tough spots
- A spray bottle for cleaning solutions
- Paper towels for drying
Step-by-Step Cleaning Process
Cleaning your portable ice maker involves several steps designed to address both internal and external components. A systematic approach will ensure that every area receives attention and is sanitized thoroughly. Follow this step-by-step process for effective cleaning.
Disassembling the Ice Maker
Begin by unplugging the machine and removing any leftover ice. Next, take out the ice tray or bucket, if it’s removable. Consult your user manual for specific instructions regarding disassembly. Ensuring you understand how to safely take apart your ice maker will prevent damage during cleaning. Once disassembled, you can proceed to clean each part efficiently.
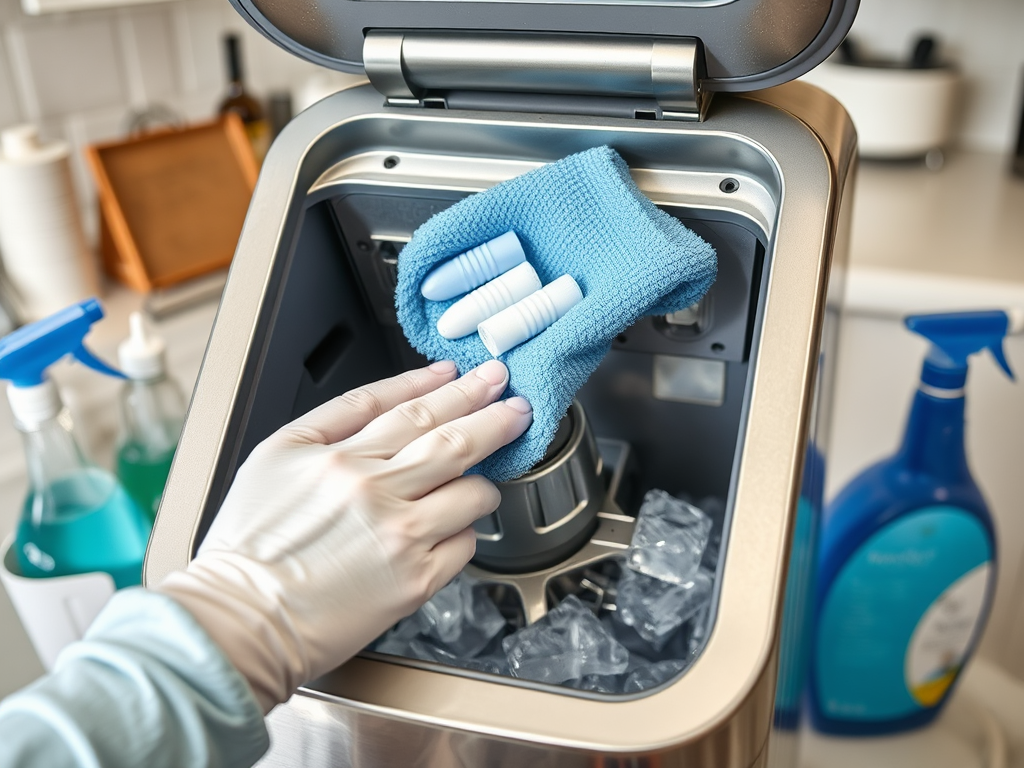
Cleaning Internal Components
Clean the internal parts using a solution of equal parts water and white vinegar. Gently scrub surfaces with a soft cloth or sponge. Be particularly mindful of the water reservoir and the ice-making unit, as these areas are prone to build-up. If necessary, use a brush to reach crevices. Rinse thoroughly with clean water after scrubbing to remove any residue. It’s not uncommon for scaling to occur, so this deep clean is crucial.
Wiping Down the Exterior
The exterior of your ice maker deserves attention as well. A simple mix of mild dish soap and warm water can do wonders in removing fingerprints and dirt. Using a soft cloth, wipe down all surfaces, making sure to cover hard-to-reach areas like around buttons and vents. After cleaning, dry the exterior to prevent water stains. Keeping your machine looking good is as important as its functionality, so don’t skip this step!
| Component | Cleaning Frequency | Recommended Cleaning Method |
|---|---|---|
| Water Reservoir | Every Week | Vinegar and Water Solution |
| Ice Storage Bin | Every Month | Warm Soapy Water |
| Exterior Surface | Every Week | Mild Dish Soap and Cloth |
| Internal Components | Every 3-6 Months | Commercial Descaler |
Tips for Maintaining Cleanliness
While regular deep cleaning is crucial, maintaining cleanliness between sessions is equally important. Here are a few strategies to consider:
- After each use, empty excess water from the reservoir to prevent stagnation.
- Store the ice maker in a cool, dry location, avoiding direct sunlight.
- Clean spillages immediately to prevent build-up and odors.
Regular Maintenance Schedule
Establishing a predictable cleaning routine will help. Aim to clean the internal components every 3 to 6 months based on usage frequency. Setting reminders on your phone or calendar can assist in keeping you accountable. The small effort invested in regular maintenance will pay dividends in the long run, enhancing both performance and hygiene.
Quick Cleaning Hacks
If you’re pressed for time, here are quick cleaning hacks for busy users:
- Use hot water and vinegar for a rapid rinse of the water reservoir.
- Keep a small bottle of vinegar nearby to spot-clean any mold or debris immediately.
- Consider using ice cubes made from vinegar occasionally to cleanse the ice-making components.
Conclusion
In conclusion, regular cleaning and proper maintenance of your portable ice maker are integral to its performance and hygiene. By following the best practices outlined above, you can enhance the cleanliness, efficiency, and longevity of your ice maker. Remember, a clean ice maker means fresher ice and ultimately better-tasting drinks. Commit to a cleaning schedule and incorporate quick maintenance tips, and you’ll find that keeping your machine in top shape becomes a manageable task.
Frequently Asked Questions
- How often should I clean my portable ice maker? Every 3 to 6 months, depending on usage.
- Can I use vinegar to clean my ice maker? Yes, a mixture of vinegar and water works effectively for descaling and sanitizing.
- What should I avoid when cleaning my ice maker? Avoid abrasive cleaners and harsh chemicals to prevent damage to the machine.
- Is it necessary to filter the water I use in my ice maker? Yes, filtered water helps reduce mineral buildup and improves ice quality.
- Are there specific parts that need more attention during cleaning? Focus on the water reservoir and ice storage bin to target bacteria and mineral build-up.